
Glowing Glass Button
A simple, elegant, glass button that looks as if it is glowing.
- Elliptical Marquee Tool
- Rectangular Marquee Tool
- Polygonal Lasso Tool
- Blending Options


Today we will be making a glass button. However this is not an ordinary glass button because well, you probably know because you clicked the link!
Now there are two ways to start this tutorial:
A. You can start
making the button in a layout you
already have
B. You can create
a new image and make the button
on that
I would highly suggest choice B because once you learn how to do this, it will be a piece of cake to do it again.
For reference, steps 1-9 are preparation while step 10 is application of the button.
First, create a new image say 150x50px and Fill ( Edit > Fill ) the background with the color Black ( Hex #000000 ) You will be able to change this color later so do not worry about it now.
Create a new set and name it “glowing glass” You will be making your button in this set. Create a new layer in the set and name it “glass”
P.S. Don’t know how to make a set? Go Layer > New > Layer Set
Take the Elliptical Marquee Tool and change its settings to what is shown below.
![]()
 Now make a selection on the left side of your image. You should notice
how the circle does not change size
hence the “fixed size”. Fill ( Edit > Fill ) this circle with White ( Hex #ffffff ). Do not deselect at this point.
Now make a selection on the left side of your image. You should notice
how the circle does not change size
hence the “fixed size”. Fill ( Edit > Fill ) this circle with White ( Hex #ffffff ). Do not deselect at this point.
While pressing the Shift key, press the right arrow key. You will see the selection move 10 pixels at a time. Move the selection as many times right as you want your button long. I went for 9 moves.
 Fill ( Edit > Fill ) the selection
with White ( Hex #ffffff ). Deselect the selection.
Fill ( Edit > Fill ) the selection
with White ( Hex #ffffff ). Deselect the selection.
Now comes the fun part, the button is not looking like a buttons shape so we have to make it look like one.
Take your Rectangular Marquee Tool and change the settings back to the default.
![]()
Now what you want to do is create a selection of the buttons insides. You will see what I mean from the image below:

Image is Zoomed In
 Fill the selection
with White ( Hex #ffffff ) and deselect.
Fill the selection
with White ( Hex #ffffff ) and deselect.
Yay you have a button looking shape! Time to make it look like a button now!
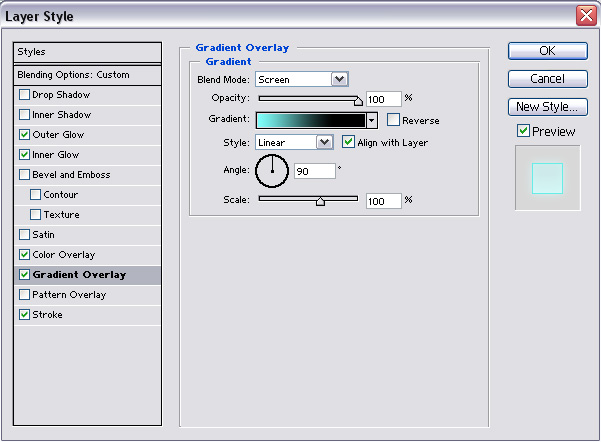
Right click layer “glass” on your Layer Palette and open the “Blending Options...” for it.
Insert the following settings:
 |
 |
 |
 |
 |
The Blue I use is #00FFF7 |
You may be thinking “hey that looks really stupid.” Yes it does. But we can change that!
 Invert ( Ctrl-I or Image > Adjustments > Invert ) the colors of the image. Change the Blending Mode of layer “glass” to "screen".
Time to create the reflection on the top. Create a new layer and name it “reflection”.
While pressing Ctrl, click on layer "glass". Press D to reset the Color Palette and choose your Gradient Tool. Make sure your settings are the image below.
![]()
Using the Gradient tool, while pressing shift, click and drag from the bottom of the button to the top. Change layer "reflections" Blending Mode to “screen” and turn down the Opacity to 32%.
 Take the Elliptical Marquee Tool and make a selection like the
image to the right. The selection will
be a large circle so you may have
to zoom out or make the window
larger.
Take the Elliptical Marquee Tool and make a selection like the
image to the right. The selection will
be a large circle so you may have
to zoom out or make the window
larger.
P.S. Need help on this? Start the selection about the width of the image left of the image and drag down and right until it looks right.
Press delete and deselect.
The button is done and it is time to add the text. You can use any text you want but I highly recommend using BitDust 2.
BitDust 2 [ DOWNLOAD ]
 Take the Horizontal Type
Tool and
write something on your button
in White ( Hex #ffffff ).
Take the Horizontal Type
Tool and
write something on your button
in White ( Hex #ffffff ).
 Looking a little
blank isn’t it? Let’s
add a blending option. Open up
the Blending Options for the text layer. Apply what is shown in the image to the left.
Looking a little
blank isn’t it? Let’s
add a blending option. Open up
the Blending Options for the text layer. Apply what is shown in the image to the left.
Yay the button is done. You can skip to part II now if you want but If you want to make your button even better, keep reading.
We are going to add a reflection of the text. Duplicate the text layer and Flip the text vertically ( Edit > Transform > Flip Vertical ).
Now move it down until it is 1 pixel under the original text
Go layer > add layer mask > reveal all. Take the Gradient Tool and while pressing shift, drag from the bottom of the text you just made to the top of the right side up text.

You should have a nifty reflection of your text.
Now we are going to add a divider and an arrow to the button. Create a new layer and call it “divide”.
 Take the Rectangular
Marquee Tool and make a 1x18
pixel selection (in other
words make a selection that is
1 pixel wide and goes from 1 pixel
away from the top to 1 pixel away
from the bottom of the button).
Take the Rectangular
Marquee Tool and make a 1x18
pixel selection (in other
words make a selection that is
1 pixel wide and goes from 1 pixel
away from the top to 1 pixel away
from the bottom of the button).
Now Fill ( Edit > Fill ) this with Black ( Hex #000000 ) and move the selection 1 pixel over to the right and Fill ( Edit > Fill ) it with White ( Hex #ffffff ) Change the Blending Mode of layer “divide” to “soft light”.
![]() Create a new
layer named “arrow”. Take the Polygonal Lasso
Tool and make a selection
of an arrow like the image to the left.
Create a new
layer named “arrow”. Take the Polygonal Lasso
Tool and make a selection
of an arrow like the image to the left.
Fill ( Edit > Fill ) it with White ( Hex #ffffff ).
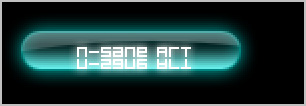
 Yay you are done
with the button and the extras!
Yay you are done
with the button and the extras!
So far you are probably thinking “Why did he say this was a simple button! It is so many steps!” Well here is a surprise. Making it takes some time but after that it is really easy to use everywhere. That is why this last steps is the only step necessary for applying the button.
When you want to use this button somewhere, just drag the layer set “glowing glass" into any image as many times as you want buttons. It is that easy. If the background of the image is very bright, change the text to black. If you did the reflection, remember to change that text too.
To change the text, just use the text tool.
To change the color of the button, just go into the Blending Options of layer “glass” and change all the colors.
Simple isn’t it? Thank you for following through this tutorial and have a great time using your new buttons!
