Indent Text
Learn how to create this punched out text using only layer styles.
- Blending Options
First create a new document. I created a 328x85px document and filled ( Edit > Fill ) the background with color Hex #4e4e4e.
Using the Horizontal Type Tool, write some text. The text I created uses the font "Ariel Black" at a size of 72pt and with a color of white ( Hex #ffffff ).

Change the Blending Mode of the layer to "multiply". Your text should disappear. This is fine.
All this style of text needs in order for completion is a Layer Style. To create the layer style, open the Blending Options of the text layer. Do this by right clicking the layer on the Layer Palette and clicking on "Blending Options".
Over the next 5 steps, we will be adding 5 Blending Options: Inner Shadow, Outer Glow, Inner Glow, Gradient Overlay, and Stroke.
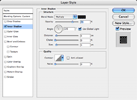
 First we will add the Inner Shadow. Click on the image to the left and use the values shown in your own Layer Styles window.
We use the Inner Shadow to add the illusion of an indentation. Basically, we are creating the "hole" of the text.

 Now add an Outer Glow. Click on the image to the right and use the values shown in your own Layer Styles window.
The Outer Glow is used in this case to make the outer edge of the text look as if it is lifting up. This helps create contrast between the hole and the surrounding metal.

Now you want to save this Layer Style so you can use it later whenever you want. Without closing your Blending Options, click on the "New Style..." button. Name your style "Indent Text" and Click "OK".
You should now be able to click on the style in the Styles Window ( Window > Styles ) to apply it to any layer you want. It works best on text layers but it will also work for anything else!


