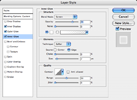
Glass Text
Learn how to create glassy and translucent text using only layer styles.
- Blending Options
First create a new document. I created a 328x85px document and filled ( Edit > Fill ) the background with color Hex #4e4e4e.
Using the Horizontal Type Tool, write some text. The text I created uses the font "Ariel Black" at a size of 72pt and with a color of black ( Hex #000000 ).

Change the Blending Mode of the layer to "screen". Your text should disappear. This is fine.
All this style of text needs in order for completion is a Layer Style. To create the layer style, open the Blending Options of the text layer. Do this by right clicking the layer on the Layer Palette and clicking on "Blending Options".
Over the next 5 steps, we will be adding 5 Blending Options: Inner Shadow, Outer Glow, Inner Glow, Gradient Overlay, and Stroke.
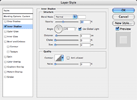 First we will add the Inner Shadow. Click on the image to the left and use the values shown in your own Layer Styles window.
We use the Inner Shadow to create the reflection on the top of the Glass Text. This makes the text look 3-dimensional.

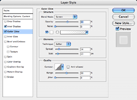 Now add an Outer Glow. Click on the image to the right and use the values shown in your own Layer Styles window.
The Outer Glow is used in this case to do just what the Blending Option implies: it id to make the text glow. Glass is cool but lighted glass is better for our purposes.

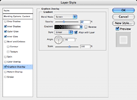 Apply a Gradient Overlay. Click on the image to the right and use the values shown in your own Layer Styles window.
Glassy/transparent objects look nice when the bottom half is brighter than the upper half. When the upper half is brighter, it makes an object look opaque.
This trick only works when you have a conflicting layer that indicates a transparent layer. In this case we have the reflection we made in step 2. The reflection implies that there is some layer that bends outward. The gradient layer implies that there is some layer that bends inward. Because we see both in the same place, our brains comprehend that one layer is showing through the other layer.
We add this Gradient Overlay to act as a way to trick the eye into believing the text is transparent.

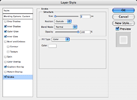 Finally, add a Stroke. Click on the image to the left and use the values shown in your own Layer Styles window.
The stroke adds definition to the text. When a light is passed through glass, only edges on the glass light up. This means things like scratches and the outer edges of glass light up. The stroke highlights the outer edges of our glass text.

Now you want to save this Layer Style so you can use it later whenever you want. Without closing your Blending Options, click on the "New Style..." button. Name your style "Glass Text" and Click "OK".
You should now be able to click on the style in the Styles Window ( Window > Styles ) to apply it to any layer you want. It works best on text layers but it will also work for anything else!


