3D Text
Learn how to create this convincing 3-dimensional effect using only layer styles.
- Blending Options
First create a new document. I created a 328x85px document and filled ( Edit > Fill ) the background with color Hex #4e4e4e.
Using the Horizontal Type Tool, write some text. The text I created uses the font "Ariel Black" at a size of 72pt and with a color of white ( Hex #ffffff ).

All this style of text needs in order for completion is a Layer Style. To create the layer style, open the Blending Options of the text layer. Do this by right clicking the layer on the Layer Palette and clicking on "Blending Options".
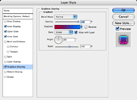
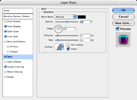
Over the next 5 steps, we will be adding 5 Blending Options: .
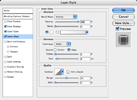
 First we will add the Inner Shadow. Click on the image to the left and use the values shown in your own Layer Styles window.
We use the Inner Shadow to create the bottom edge of the tet. This makes the text look 3-dimensional by making the text look as if it is rotated slightly forward.

You cannot see the effects you apply until step 5 so do not worry.
Now you want to save this Layer Style so you can use it later whenever you want. Without closing your Blending Options, click on the "New Style..." button. Name your style "3D Text" and Click "OK".
You should now be able to click on the style in the Styles Window ( Window > Styles ) to apply it to any layer you want. It works best on text layers but it will also work for anything else!


